How to Create "Bill of Supply"
In order to create a Bill of Supply follow the given procedure:
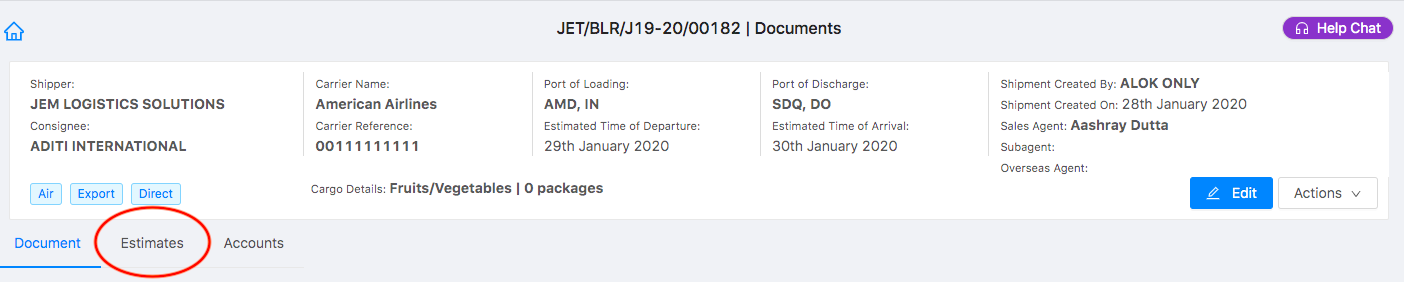
- Log on to Shipmnts Operations Module and select the job for which you want to create an invoice.
- Go to the “Estimates tab” in the concerned job (as shown in figure)
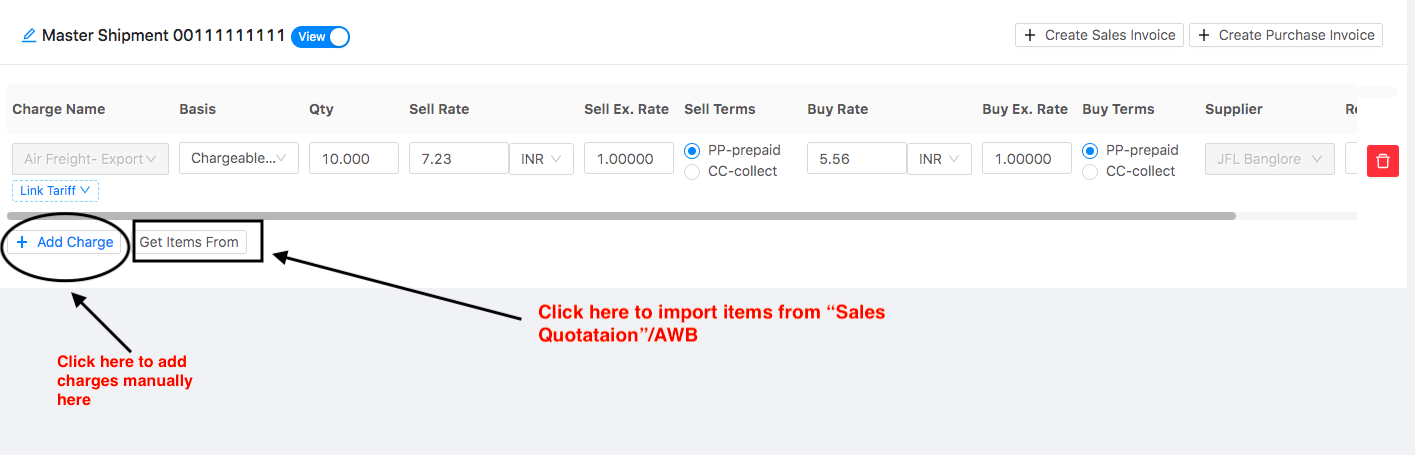
Verify your data and click on “Create Sales Invoice” to create sales invoice directly from the job.
If you have made an error in your job or wish to enter more charges, you can click on the toggle button “Edit” and add more charges.
You can also add charges manually by clicking on “Add Charge” as well as import it from “Sales Quotation” or “AWB” by Clicking on “Get Items from”
Refer article "How to Get items from MAWB (For Invoicing)" and "How to get items from Sales Quotation (For invoicing)" to know the process in detail
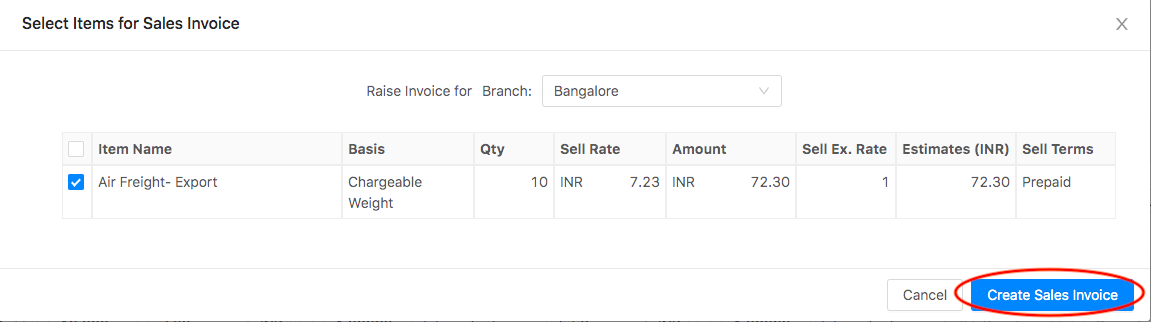
- Once you click on “Create Sales Invoice” following pop-up would appear:
You can select the branch and charges for which you want to create an invoice and click on " Create Sales Invoice" (as shown in figure)

- Following page will open with data already auto-filled from the concerned Job/Shipment
- Select “Bill of Supply” from the invoice type ( as shown in figure)
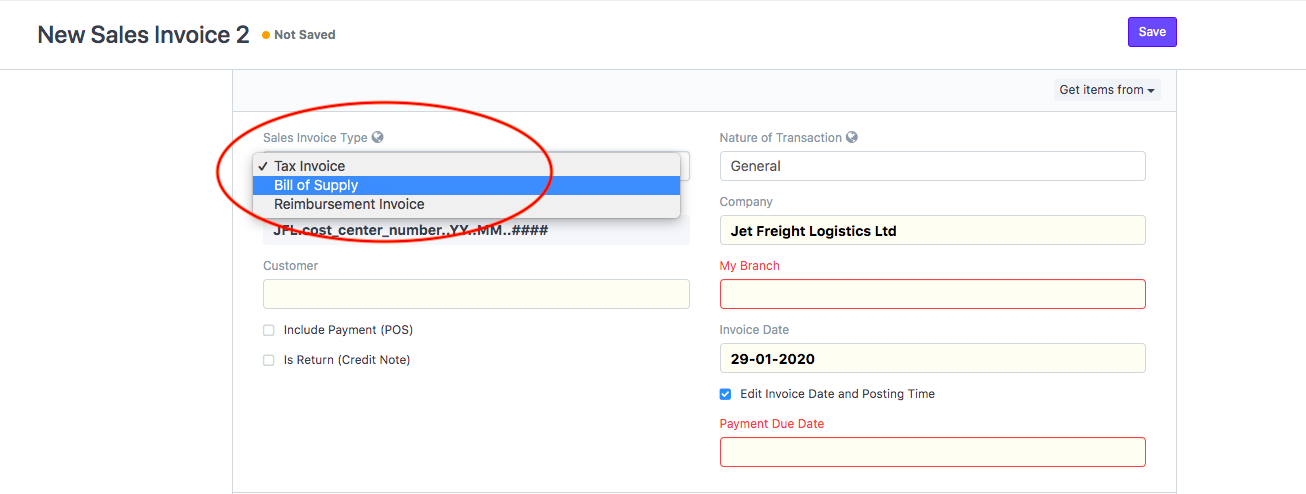
- Customer: Enter the customer name for whom you want to raise the invoiceIf the customer does not exist, click on "Create New Customer" to create a new customer (as shown in figure)
Note: For further steps you can refer the article "How to create a new customer"
- Company: Your company name would be auto-filled by defaultIf you have multiple companies registered with us in the same module, you need to select the company for which invoice is raised
- Invoice Date: Would be by default as current date.
If you want to change your Invoice date and posting date, tick the check-box as shown in the figure and you can edit it as per your business needs.
- Payment Due Date: Would be auto filled based on the customer template set
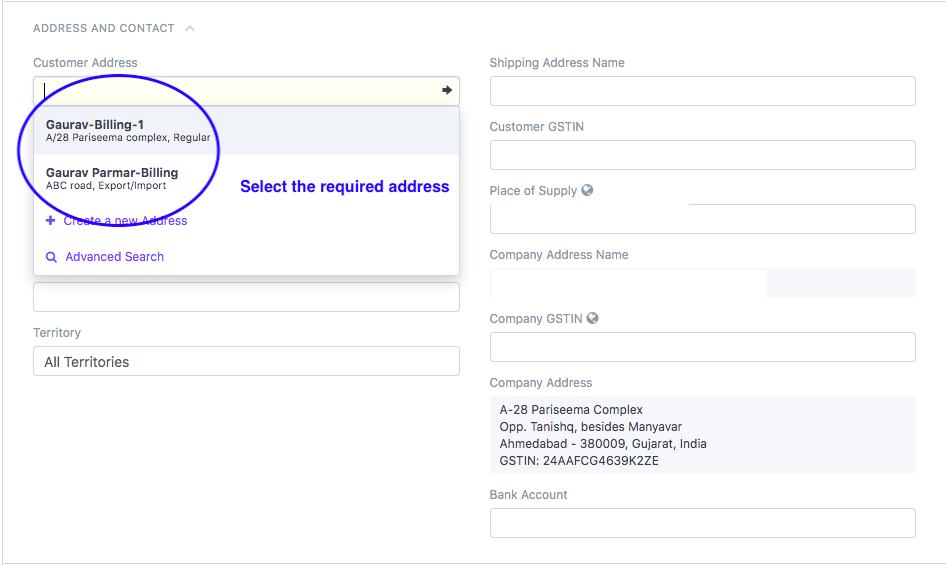
- Address and contact details will be auto-filled by the Customer name
If a customer has multiple addresses, you can select the required address for which invoice is raised from the drop-down (as shown in figure)
Note:If the Address does not exist click on "Create New Address"
Refer "How to Add Customer Address during sales invoice creation " to know the process
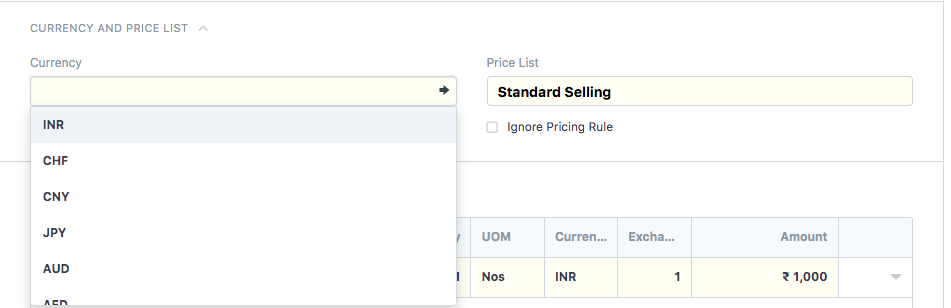
You need to select the currency in which you want to create the invoice from the Currency section (as shown in figure)
By default it would be the currency set as per your company
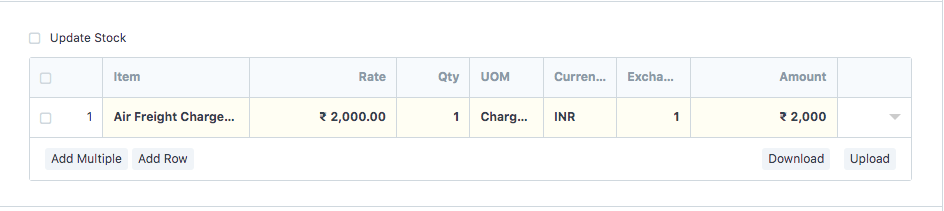
- In the next section you will see all items/charges from job has been auto added to the invoiceYou can add more charges or items here if you want to by clicking on "ADD ROW" (as shown in figure)
Note:If you add more charges here in the invoice, they would automatically be added in the "Job/Shipment" and can be seen under "Estimates" tab
Only non-taxable item is allowed here as “Bill of Supply” contains items on which tax is not levied
- Click on "Save" and you would be able to see the non-taxable amount accordingly (as shown in figure)

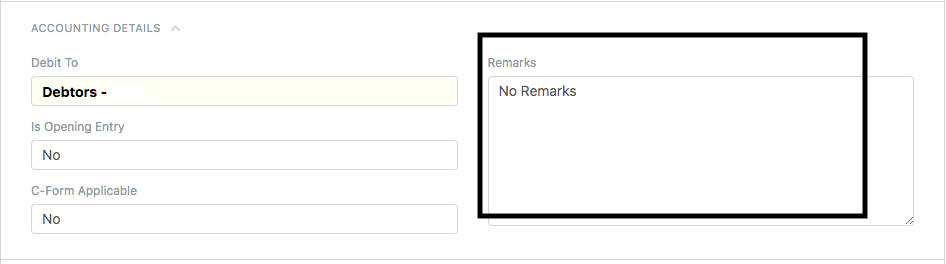
- "Remarks" would be fetched from job.
You can change/edit remarks if you want to in the "Remarks" section (as shown in the figure)
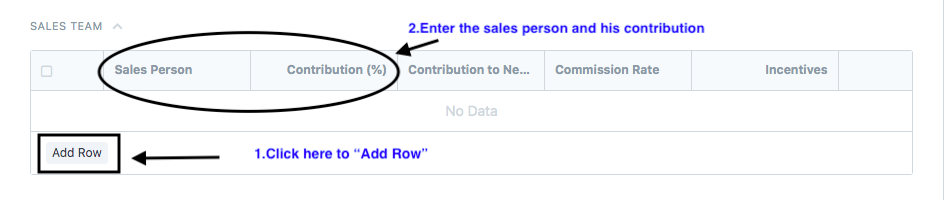
- Your sales person is auto-filled by the customer master data.You can also enter/edit the sales person related only to this transaction and mark his contribution
Refer article: How to change sales person for particular sales invoice only?
- Click on "Save and Submit"
How to print Bill of Supply
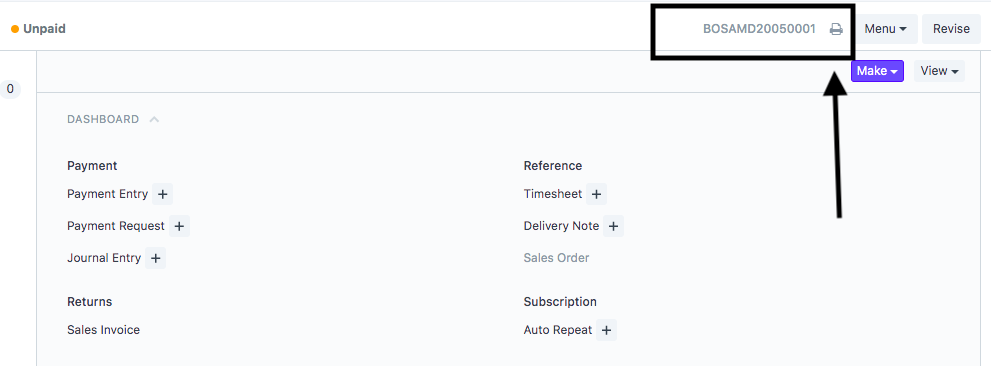
- Once you have made the sales invoice, you can print the invoice by clicking the print icon (as shown in figure)
On clicking the icon, you will be able to see the preview of your invoice before printing
- Select the format in which you want to print your invoice and then click on "Print"(as shown in figure)
 Did this answer your question?
Related Articles
How to Create "Bill of Supply"
How to Create "Bill of Supply" A Bill of Supply is issued when GST is not applicable on a transaction or when GST is not to be recovered from the customers. Alok Patel In order to create a Bill of Supply follow the given procedure: Log on to Shipmnts ...How to create Reimbursement Invoice.
How to create Reimbursement Invoice. An invoice generated by freight forwarder to the shipper (customer) for charges paid by him(Freight Forwarder) on behalf of the shipper. Alok Patel Log on to Shipmnts Operations Module and select the job for which ...How to create Reimbursement Invoice.
How to create Reimbursement Invoice. An invoice generated by freight forwarder to the shipper (customer) for charges paid by him(Freight Forwarder) on behalf of the shipper. Alok Patel Log on to Shipmnts Operations Module and select the job for which ...How to create a Forex Sales Invoice
How to create a Forex Sales Invoice Helps you create an invoice where you have made the transaction in a foreign currency Alok Patel When you have made sales of certain commodity in some other currency and you want to raise an invoice for it you can ...How to create a Forex Sales Invoice
How to create a Forex Sales Invoice Helps you create an invoice where you have made the transaction in a foreign currency Alok Patel When you have made sales of certain commodity in some other currency and you want to raise an invoice for it you can ...